Sturtevant Family Adventures
Tuesday, December 27, 2011
Tarragon Mustard Chicken
My step-mom, Sharon, sent over this recipe for Tarragon Mustard Chicken, one of her go to dinners (as you can see by the delightfully well-loved recipe sheet). It looked yummy, so I made it. But it wasn't yummy. It was, as Cory puts it, "the best f***ing chicken EVER". Once swearing is involved in a meal critique, I'd say jackpot hit.
It may not be the prettiest chicken dish ever, but it really is very easy, and ridiculously delicious.
Tarragon Mustard Chicken
Recipe adapted from Chef Rodolfo
8 pieces Chicken Breast (or pork loin slices if you prefer)
1 tsp Yellow Mustard Seeds, crushed
1 tbsp Soy Sauce
Salt and Pepper to taste
1 tbsp Butter
1 tbsp Grapeseed Oil (or Olive Oil)
2 tbsp Green Onions, finely minced
1 tsp Fresh Tarragon Leaves, coursely chopped
2 tbsp Dijon Mustard
1/3 cup Cream
1/4 cup Extra Dry White Vermouth
Season the meat with the soy sauce, sugar, salt and pepper (mix it in a bowl and soak the meat in to soak while you gather and prepare the other ingredients). Rub meat with the mustard seeds and press the seeds in on one side.
In a fry pan, add the oil and butter and sear the meat, starting on the side with the mustard seeds. Keep cooking and turning them until fully cooked, about 5-8 minutes. Set aside and keep warm.
In the same pan, cook the onions for a minute, add the vermouth and whisk in the pan to release all the crusty goodness from the pan (technically, this is called deglazing the pan, but there is no need to get overly fancy). Add the remaining ingredients and simmer slowly until you have a nice smooth sauce for your chicken. Add the cooked meat, with any released juices, coat with the sauce and serve.
Enjoy!
Saturday, December 10, 2011
Christmas Cookies
I love sugar cookies. They are easily my hands down favorite among cookies, and possibly among all baked goods! I love them so much that my usually fabulous husband made me cry when he said a few year back, "why do people even make sugar cookies? No one likes them anyway!"
I love the simple, sweet, vanilla taste. I love all the pretty shapes you can make depending on the season. I love spreading frosting on them and coating them entirely with colorful sprinkles. Quite frankly, I don't know what's NOT to love.
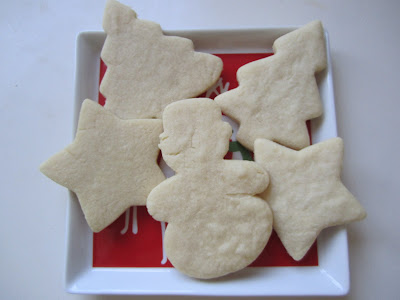
Each year, my little brother and I make Christmas cookies - really, they're sugar cookies in Christmas shapes, including a giant reindeer cutter that signals that Christmas is here. And we always use the same recipe, a Martha Stewart one from one of her entertaining books from the 80's. A true classic.
With all my love for this humble, classic, simple cookie, you can imagine my horror this fall when I realized I was pretty gluten-intolerant and my only shot at Christmas cookies would be to make them without flour. While I can get behind the idea of using flour replacers in more complexly flavored cookies, the sugar cookie has so few ingredients that I was afraid I wouldn't be happy with a flour-free result.
Lo and behold, Cup 4 Cup has saved my Christmas! I made both traditional and gluten-free versions with the same old recipe, and they turned out almost identical. Truth be told, the gluten-free ones were kind of annoying to roll out, but not impossible. And I'm happy to go through a little annoyance to have my favorite treat not make me sick. Can you tell which cookie is which? Neither can I (except of course that I can because I really don't want to eat the wrong ones!).
Enjoy these, either glutenous, or gluten-free!
Basic Sugar Cookies
from one of Martha Stewart's many books
2 cups flour (All-purpose, or Cup4Cup)
1 cup white sugar
1 egg
1/2 tsp baking powder
1 tsp vanilla extract
1 stick salted butter, room temperature, cut into little pieces
Put the butter and sugar in a food processor and cream until you just have small clumps of sugar/butter. Then add the egg and vanilla, and blend until smooth. Add the baking powder and flour and mix until the dough is a big ball rolling around in the food processor. Or until it's all mushed together.
Wrap the dough in two separate chunks in some plastic wrap and refrigerate until cold, at least half an hour. It helps the rolling out process if you wrap the chunks in round disk shapes.
Preheat the oven to 325. Roll out the dough to your desired cookie thickness and cut out whatever shapes you please! Bake on a cookie sheet for about 12-14 minutes.
Once they're cooked and cooled, mix together a cup of powdered sugar with just enough milk, cream, water, or lemon juice, to make it a soupy paste. Spread a thin layer on each cookie with a paint brush, and then sprinkle with abandon!
By the way, the cookies on the left are the old fashioned flour ones, and the cookies on the right are their gluten-free counterparts :)
Enjoy and Merry Christmas!!
Thursday, November 24, 2011
Shoofly Pie
We had savory pies, then big, luscious slices of sweet pie. Mr. chose a slice of Shoofly Pie, and that was the beginning of the end of our waistlines.
Shoofly Pie is a gooey, spiced molasses pie, unlike anything else we've tasted. And at least once a year, certainly on Thanksgiving, we give thanks to the Amish for giving us this delectable treat!
Shoofly Pie
Adapted from the Splendid Table
Makes one 9-inch pie; serves 8 (or 2, if you've invited my husband for a slice!)
Pie crust (for a single layer 9-inch pie):
* 1 and 7/8 cup flour
* 15 Tablespoons salted butter
* 2 Tablespoons sugar
* Ice Water
Pie filling:
* 1 cup all-purpose flour
* 2/3 cup light brown sugar, packed
* 1 rounded tablespoon cold butter
* 1/4 teaspoon salt
* 1 egg
* 1 cup molasses
* 3/4 cup cold water
* 1/4 cup hot water
* 1 teaspoon baking soda
* 1/2 teaspoon Cinnamon
* 1/8 teaspoon Ground Ginger
* 1/8 teaspoon Nutmeg
* 1/8 teaspoon Ground Cloves
Make the pie crust. In a food processor, or with a pastry cutter, mix the flour, sugar and butter until it is crumbly. Then slowly add ice water until the dough forms a ball. Refrigerate for an hour (if you can wait that long!) and then roll out the dough and line a 9-inch pie pan.
Preheat the oven to 350 degrees.
In a food processor bowl, combine the flour, brown sugar, butter, and salt. Remove 1/2 cup of the mixture and set aside.
Transfer the rest to a medium mixing bowl. In a small bowl, beat the egg lightly. Add the molasses, Spices and cold water, and blend but do not beat; you don’t want bubbles in the batter. Set aside.
In a small bowl, mix the hot water with the baking soda and blend into the molasses mixture. Add to the flour mixture and mix well.
Pour into the pie shell and top with the reserved crumbs.
Bake for 35 minutes. The pie will appear quivery but will firm up as it cools. Transfer to a rack to cool completely before cutting.
Tuesday, November 22, 2011
Adventures in Gluten-Free Land
Plus, I love baking, and baking gluten-free is no fun. First you need to buy all kinds of weird ingredients, like xantham gum, tapioca starch, sorghum powder...following the "grandma rule" of eating, my grandmothers would NOT recognize these ingredients in their kitchens. Then you have to trash your favorites and find all new recipes using the above stuff.
Happily, Thomas Keller has come to the rescue with Cup 4 Cup, a direct replacement for all-purpose flour. Yes, it is simply a combo of all those weird ingredients I already mentioned, but it is intended to replace the flour in your favorite recipes, one for one. And yes, it is ridiculously expensive, at $20 for 3 lbs of flour. And yes, you can only buy it at Williams-Sonoma, so you have to brave the holiday shopping crowds if you want to make your traditional holiday cooking gluten-free. But it's worth it!!
So far, we have made pancakes and pie crust. Both had a very different, somewhat gummy, texture when raw (unlike their glutenous counterparts), but cook up just perfectly, and there is really no difference in taste with the original recipe. Next up, chocolate chip cookies...
Sweet Potato Ginger Pudding
Here is the beauty of my recipe theft, from the well-worn Williams-Sonoma Thanksgiving book in my Stepmom's pantry:
Sweet Potato Ginger Pudding
2 lb. yellow-fleshed sweet potatoes, unpeeled
Finely grated zest of 1 lemon
1/2 tsp. salt
1/3 cup crystallized ginger, finely chopped
1-1/2 cups heavy cream
1/4 teasp. freshly grated nutmeg
4 egg whites
1. Place the sweet potatoes in a large saucepan with water to cover. Bring to a boil, reduce the heat, cover and cook until tender, 30-40 minutes. Drain and let cool.
2. Meanwhile, preheat an over to 350. Position a rack in the middle of the oven. Butter a 2-qt. souffle dish or baking dish.
3. Peel the cooled potatoes and place in a food processor fitted with the metal blade. Process to a smooth puree. You should have about 2-1/2 cups. Transfer the puree to a large bowl and stir in the lemon zest, salt and crystallized ginger. Then stir in the cream and add nutmeg to taste.
4. In a separate bowl, using an electric mixer set on medium speed, beat the egg whites until soft folds form. Add about one-fourth of the beaten whites to the potato mixture and stir in well to lighten it. Then, using a rubber spatula, gently fold in the remaining whites, being careful not to deflate the mixture. Spoon into the prepared dish.
5. Bake until risen and slightly golden on top, 40-50 minutes. Serve immediately.
Serves 8-10
Saturday, November 12, 2011
Savory Holiday Bread Pudding
The hubby and I realized, after many a dry, tasteless, stuffing, that what I was looking for was really a savory sausage-y version of my Mama's bread pudding - moist and creamy, in need of no gravy (as much as I love gravy!). And last night, I hit the jackpot - the perfect stuffing - or maybe more appropriately named, "Savory Holiday Bread Pudding."
Savory Holiday Bread Pudding
Recipe adapted from Our Best Bites, who adapted it from Allrecipes
Ingredients:
8x8″ pan of Cornbread, minus one taster square for the chef (I used the incredibly delicious gluten-free version from Pamela's)
3/4 pound Mild Italian sausage
1 medium Onion, chopped
3 stalks Celery, chopped
1 Quart Chicken Broth
2 Eggs
3 tablespoons Salted Butter
Sage (6-8 fresh leaves, chopped fine)
Rosemary (I used a tablespoon or so dried rosemary)
Fennel seeds (I used about 1-2 tablespoons dried fennel seeds)
1/4 c. chopped fresh flat-leaf Parsley
Kosher Salt and Pepper to taste
Instructions:
Preheat oven to 375. Crumble the pan of cornbread and leave in the preheating oven to dry it out a little. No need to go crazy drying it out for days. A little bit of crispy edge is plenty. Once dried, put in a large bowl.
Crumble the Italian sausage into a hot skillet and brown it over medium heat. Transfer the crumbled sausage to a paper towel-lined plate and set aside.
If there are 2 tablespoons of rendered sausage drippings in the pan, add the chopped celery, onions, and dried herbs and seeds. If not, add enough olive oil to have around 2 tablespoons of oil in the pan and add the chopped ingredients when the oil is hot. Cook, stirring frequently, for about 5 minutes or until the onions are translucent. Remove from heat and add to the crumbled cornbread. Add the sausage and chopped herbs and toss until combined. Put cornbread mixture into 9x13" baking dish.
In your now-empty, still dirty, bowl, combine the eggs and about half the chicken broth. Season with pepper, and salt, if you like. Pour mixture over the cornbread mix and press into pan so the dry ingredients are all moist. Put pats of butter around the top of the stuffing.
Bake for about 30 minutes, and then add more chicken broth over the top, if the stuffing appears at all dry. Bake another 20 minutes or so, until the top of the stuffing starts to brown and the liquid appears to have mostly cooked off. Just before serving, put the whole shebang under the broiler for a few minutes to get the top nice and crusty.
Those who know me well know that I don't mind tooting my own horn, and this recipe is no exception. It is hands down, and without a doubt, the best stuffing I have EVER had!!
Thursday, October 27, 2011
Cory's Favorite Cream Scones
So then it was my turn to apologize to him, for waking him up in the middle of the night for something he didn't actually do. What's the best way to say you're sorry in our house?
Fresh Cream Scones with Homemade Berry Jam.
Recipe adapted from America's Test Kitchen
2 cups (10 ounces) unbleached, all-purpose flour
1 tbsp baking powder
3 tbsp sugar (rounded tablespoons if you like them a little sweeter, as I do!)
5 tbsp cold salted butter (if you use unsalted butter, add 1/2 tsp of salt), cut into 1/4 inch cubes
1 cup heavy cream
Preheat your oven to 425 degrees.
Stir together the flour, baking powder and sugar in a bowl. Add the butter cubes and mix using a pastry cutter (or your fingers, if your hands are nice and cold), until the butter pieces are pea-sized. Add the cream and mix until you have a sticky ball. You want to work quickly at this point, because the flakiness of the scones is directly related to how cold your butter remains throughout the mixing process (keep it cold!).
Pat the dough into a circle on your ungreased baking sheet and cut into triangles. I separate the triangles a little bit at this point to ensure the edges all get cooked.
Brush the tops with the remaining cream that stuck to your measuring cup and sprinkle sugar on the tops, if you like your scones crunchy and sweet. Pop them in the oven and cook for about 14 minutes, or until they are lightly browned and look delicious.
Once the scones are ready, fire up the coffee pot, make a pot of your hubby's favorite brew, and deliver the scones, jam and cofee to your sleeping husband.
Apology complete. :)